Workflows
Automate your conversation management with visual, drag-and-drop workflows that trigger on events and take action automatically.
Workflows handle the repetitive parts of conversation management for you. Set one up once and it runs every time a matching event happens — no more manually assigning conversations, adding labels, or sending follow-ups.
Think "if this happens, then do that" — with the power to chain steps, branch on conditions, wait for the right moment, and call external services.
What to automate
- Route conversations — assign incoming messages to the right teammate or AI persona based on channel, content, or labels
- Send automated messages — welcome new conversations, follow up after a delay, or notify customers of status changes
- Organize conversations — add or remove labels, star important ones, resolve the finished
- Extract insights — use the AI agent to auto-extract labels, sentiment, and custom field values
- Connect external services — call your other tools through their APIs
Workflows and the built-in AI agent
Cloodot already handles conversations on its own. When a message comes in, it can auto-assign your default AI persona, and the agent replies, searches your knowledge base, follows up, and hands over to a team when it should. Workflows run alongside this built-in flow — they don't switch it off. Knowing how the two interact keeps your workflows predictable.
- The AI usually replies first on a new conversation. A workflow's steps run on their own timeline, a beat behind the incoming message, so the agent's first reply often lands before your workflow's Send Message does. Treat a workflow message as a complement to the AI's response, not a replacement for it.
- To change who owns a conversation, assign it.
- Assign to AI pins a specific persona, overriding the default one Cloodot would have picked. That persona answers from the next message on.
- Assign to User hands the conversation to a teammate and clears the AI assignee, so the agent stops replying. This is the way to route a conversation away from AI — do it early, since a persona the agent has already picked up keeps the current reply.
- Resolving or sending a message from a workflow doesn't silence the AI. Resolve Conversation only sets the status; it doesn't unassign the agent, and the AI keeps replying while a persona is assigned. To stop AI replies, reassign the conversation to a human.
- AI Agent Assigned fires a lot. Because Cloodot auto-assigns a persona to most new conversations, a workflow on the AI Agent Assigned trigger runs on nearly every new conversation — not only when you assign one by hand.
Rule of thumb
Build workflows to work with the agent — route, label, follow up, sync your CRM, call other tools — rather than trying to race or suppress its reply. When a conversation genuinely shouldn't get an AI reply, assign it to a human early in the workflow.
The Workflows page
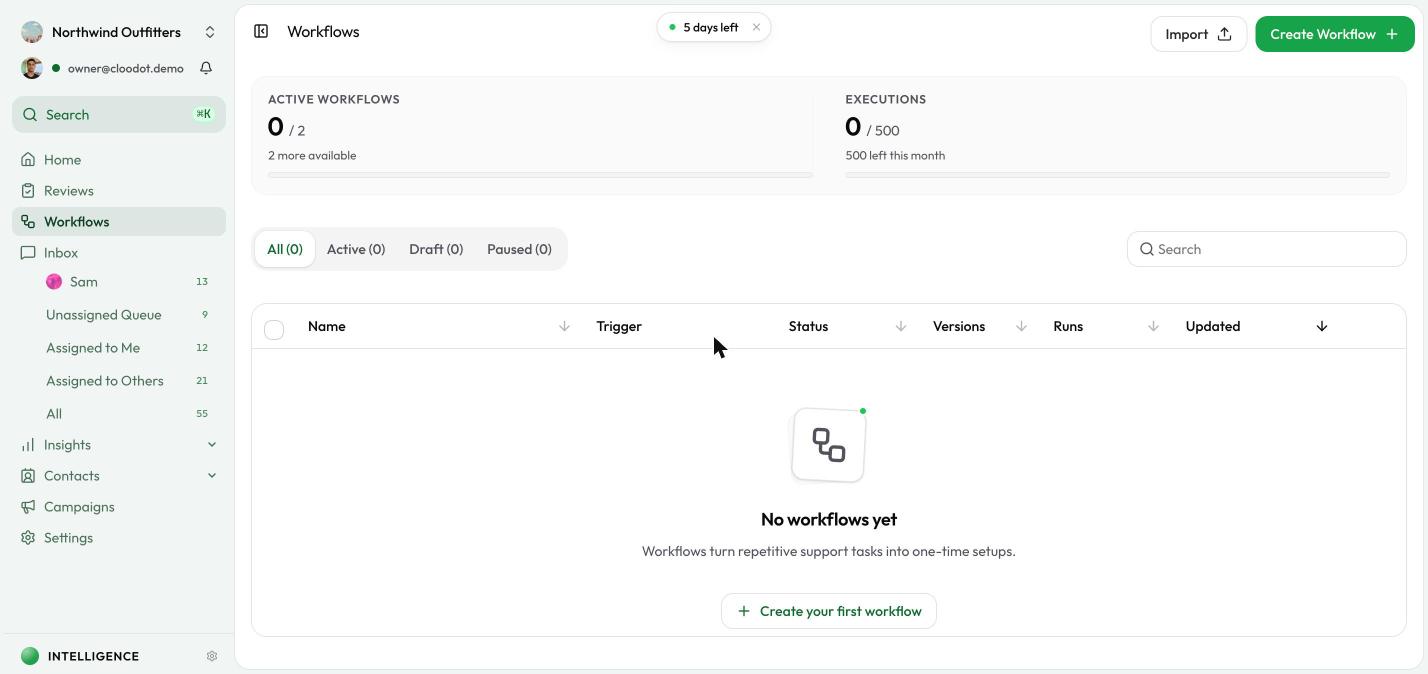
Open Workflows in the sidebar to see every workflow in a table:
- Name and description
- Trigger type — the event that starts the workflow
- Status — Draft, Active, Paused, or Archived
- Versions — how many saved versions exist
- Executions — how many times the workflow has run
Filter by status, search by name, and sort by any column. The row menu also offers Duplicate (a draft copy with the same steps and settings) and Export JSON.
Workflow statuses
| Status | What it means |
|---|---|
| Draft | Saved but not running. You can edit freely. |
| Active | Live and triggering on matching events. |
| Paused | Temporarily stopped. Can be resumed anytime. |
| Archived | No longer in use. Preserved for reference. |
Create a workflow
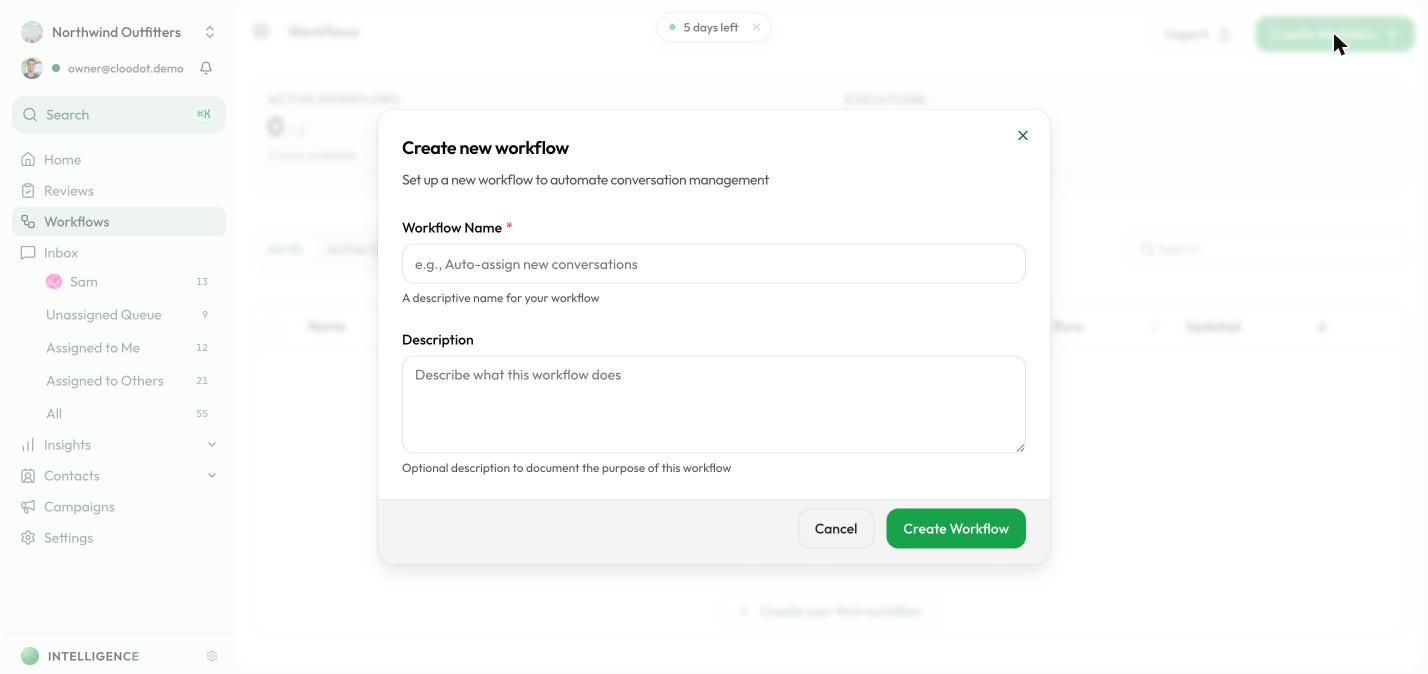
Click Create Workflow at the top right to open the template gallery. Browse by category, search by name, and check each template's step-by-step preview before committing.
| Category | Templates |
|---|---|
| Get started | Start from scratch (blank canvas) |
| Messaging | Welcome new conversations · Follow up after an hour · Ask for feedback when resolved |
| Routing | Flag urgent messages · Route new conversations to AI |
| AI | Triage with AI — extract sentiment and urgency, star the urgent ones |
| Housekeeping | Auto-resolve stale conversations |
| Integrations | Forward webhooks to your API · Alert your team on workflow failures |
Templates marked Ready to publish work the moment you create them — tweak the copy to match your voice and publish. Templates marked Needs setup tell you exactly what to fill in first (an endpoint URL, an AI persona).
You can also start from one of your own workflows: the gallery lists them with a Use as template button that clones the workflow as a new draft.
Pick a starting point, give it a name and optional description (templates suggest both), and click Create Workflow — you land in the visual editor with the steps already wired.
The workflow editor
Build automation logic visually.
Canvas
Drag nodes from the sidebar onto the canvas, then connect them by dragging from one node's output handle to another node's input handle.
Handy controls:
- Auto-layout — the wand icon arranges nodes neatly
- Mini map — the map icon gives you a bird's-eye view of larger workflows
- Snap to grid — nodes align automatically for a clean layout
Left sidebar
Lists node types by category:
- Triggers — events that start your workflow
- Actions — things the workflow does (send messages, assign conversations, etc.)
- Logic — decision nodes, delays, and end nodes
Drag any node onto the canvas. The Simple API Request node isn't in the sidebar — add it from the command bar with ⌘K.
Right sidebar
Click any node to open its configuration panel on the right. Cloodot saves changes as you configure them.
Top action bar
- Runs — execution history and logs
- Test — run the workflow with sample data
- Clear — discard unsaved changes
- Save — create a new version without publishing
- Publish — save and activate the workflow
Triggers
Every workflow starts with exactly one trigger — the event that kicks things off.
Available triggers
| Trigger | Fires when... |
|---|---|
| New Conversation | A brand-new conversation is created |
| AI Agent Assigned | An AI persona is assigned to a conversation |
| Human Agent Assigned | A team member is assigned to a conversation |
| Conversation Opened | A conversation's status changes to Open |
| Conversation Resolved | A conversation is marked as Resolved |
| Conversation Starred | A conversation is starred |
| WhatsApp Flow Submitted | A customer completes a WhatsApp Flow (native in-chat form) — the answers become variables like {{trigger.flowValues.<field>}} (see WhatsApp Flows) |
| Label Added | A label is added to a conversation |
| Label Removed | A label is removed from a conversation |
| Contact Stage Changed | A contact moves to a new lifecycle stage in your pipeline |
| Incoming Webhook | An external system calls the workflow's webhook URL |
| Workflow Error | Another workflow fails — use it to build error handlers (see Execution settings) |
For the exact variables each trigger provides and its loop-prevention rules, see the Trigger nodes reference.
Incoming Webhook setup
The trigger's panel shows the endpoint URL and a signing secret. By default every request must be signed (HMAC-SHA256 — the panel shows exactly how). If your sender can't sign requests — a simple script or a no-code tool — switch off Require signed requests in the panel. Anyone who knows the URL can then trigger the workflow, so treat the URL like a password.
Use Listen for a request in the panel's Sample event section to capture
one real request (it works before the workflow is published). The captured
payload's fields then show up as variable suggestions — like
{{trigger.payload.order.id}} — in every later step, and dry runs are
prefilled with it. The first real event is captured automatically if you
never listen.
Actions
Action nodes do the work. Add as many as you need.
Messaging
- Send Message — send an automated message. Compose the text right in the node, add quick-reply buttons or attachments, or let AI write it from a prompt.
- Send Email — reply on the conversation's email thread with an HTML or plain-text body (feature-flagged).
- Send WhatsApp Template — send an approved WhatsApp template. Fill its header and body variables with fixed text or workflow variables (e.g.
{{trigger.contactName}}). Works two ways: into the conversation the workflow started from, or — under triggers with no conversation, like Incoming Webhook — to a recipient phone number (e.g.{{trigger.payload.phone}}). In the second mode pick the channel and template, and the step creates (or reuses) the recipient's conversation; later steps act on it automatically, and it's also exposed as{{<step>.conversationId}}.
Conversation management
- Open Conversation — set status to Open
- Resolve Conversation — mark as Resolved
- Star Conversation — star for quick access
- Unstar Conversation — remove the star
Labels
- Add Label — apply one or more existing labels
- Remove Label — remove one or more labels
Assignment
- Assign to User — assign to a specific teammate
- Assign to AI — assign to a specific AI persona
AI-powered
- AI Extraction — auto-extract labels, custom fields, and sentiment from the conversation
CRM
- Create Contact — add a contact, with custom fields and a duplicate policy
- Update Contact — update a contact's details and custom fields
- Find Contact — look one up by phone or email so later steps can use it
- Change Contact Stage — move a contact to a lifecycle stage
Installed Skill Sets also appear here under Skills — each is named {Skill Set} · {skill} and only shows up when the Skill Set is installed.
Every action's parameters and outputs are documented in the Action nodes reference.
Loop prevention
To stop infinite loops, certain actions are blocked based on your trigger. For example, a workflow triggered by "Label Added" can't include an "Add Label" action. The same rule applies to other matching trigger-action pairs.
Using variables
Reference data from the trigger or any earlier step with {{variable}} templates. Type {{ in a message field, or use the Variables picker on any input that supports them.
- From the trigger —
{{trigger.messageText}},{{trigger.conversationId}}, contact details like{{trigger.contactName}},{{trigger.contactEmail}}, and{{trigger.contactPhone}}, webhook payload fields like{{trigger.payload.orderId}}, flow answers like{{trigger.flowValues.km_range}}(WhatsApp Flow Submitted), even array elements like{{trigger.payload.items.0.sku}}. - From earlier steps — each step is addressed by its name: a step called "CRM Lookup" exposes
{{crm_lookup.response.body}}. The picker shows exactly what each step produces.
Variables flow forward only — a step can read from the trigger and from steps that run before it on the same path. Renaming a step updates every reference automatically, and saving checks references so a typo or orphan is flagged with the exact step to fix instead of silently sending an empty value.
Decision nodes
Create conditional branches — the workflow follows one path if the conditions match, another if they don't.
Set one up
- Add a decision node to your canvas.
- Set up one or more conditions.
- Choose whether all conditions must be true (AND) or any condition can be true (OR).
- Connect the True path (conditions met) and False path (conditions not met) to different nodes.
Available condition fields
| Field | What you can check |
|---|---|
| Conversation Status | Open or Resolved |
| Conversation Labels | whether specific labels are present or absent |
| Conversation Channel | which channel the conversation is on (WhatsApp, Facebook, Instagram, Telegram, SMS, Email, Web chat) |
| Conversation Starred | whether the conversation is starred |
| Message Text | the triggering message — equals, contains, starts with, ends with |
| 24h Reply Window | whether the WhatsApp 24-hour customer-service window is open |
| Variable | the value of a variable from earlier in the workflow (with numeric greater than / less than too) |
The full operator-per-field breakdown lives in the Logic & flow nodes reference.
Delay nodes
Pause the workflow for a set amount of time before continuing.
Set the delay
Pick a duration and unit:
- Minutes — quick follow-ups
- Hours — same-day automation
- Days — longer sequences
Quick presets — 5 min, 15 min, 30 min, 1 hour, 2 hours, 24 hours, 1 day, 3 days.
Simple API Request nodes
The Simple API Request node calls external services directly — no code required. Add it from the command bar (⌘K); it isn't in the left sidebar.
Configure the request
- HTTP Method — GET, POST, PUT, PATCH, or DELETE
- Request URL — must start with
http://orhttps:// - Headers — add custom headers like Authorization or Content-Type
- Request Body — for POST, PUT, and PATCH, the payload to send
Use cases
- Forward conversation data to a webhook
- Look up customer info in an external CRM
- Trigger actions in other tools on specific events
- Log events to an external monitoring service
Versioning
Each save creates a new version. Only one version is active at a time — that's the one that runs.
- Save creates a new version without activating it.
- Publish creates a new version and makes it the active one.
- Previous versions stay around for review.
Execution settings
Click the settings (gear) icon in the editor toolbar to control how runs behave when something goes wrong.
| Setting | What it does |
|---|---|
| Automatic retries | Retry a failed run up to 5 times. Each retry restarts the workflow from the beginning, so steps that already ran will run again. Off by default. |
| Wait between retries | How long to wait before the first retry. The wait doubles after each attempt — 1 minute becomes 2, then 4. |
| Continue on step failure | Keep going when an action or API request fails, instead of stopping the run. The failed step stays visible in run history. |
| Error workflow | A workflow to run whenever this one fails for good (after all retries). Useful for alerting a channel or calling an external service. |
| Run timeout | A wall-clock budget for each run, including time spent in delay steps. Runs past the budget are marked failed. |
Build an error workflow
- Create a new workflow with the Workflow Error trigger.
- Add steps — for example, a Simple API Request that posts to your alerting tool.
- Publish so it's Active.
- In any other workflow's settings, select it under Error workflow.
The error workflow receives failure details as variables — {{trigger.failedWorkflowName}}, {{trigger.error}}, {{trigger.failedRunNumber}}, and {{trigger.conversationId}} when the failed run involved a conversation. Error workflows never trigger other error workflows, so a broken alert can't cascade.
Test a workflow
Before going live:
- Click Test in the editor toolbar.
- A modal opens with sample data based on the trigger type (conversation ID, status, labels, channel, message text, etc.).
- Edit the sample values to match your test scenario.
- Click Run.
- Open the Runs page to see execution details and step-by-step results.
Cloodot labels test executions separately from production runs so they're easy to tell apart.
Execution history
Click Runs to see every execution. The list updates live while runs are in progress.
Each execution shows:
- Status — Pending, Running, Completed, Failed, or Cancelled
- Trigger data — the event that started the run
- Timing — start and end times
- Error details — what went wrong on failure
- Step details — expand to see what happened at each node
Retry and cancel runs
- Retry — open a failed run's menu or detail view to retry. The retry restarts the workflow with the same trigger data and shows up as a new run with an attempt counter.
- Cancel — pending and running executions can be cancelled. No further steps execute after cancellation.
Execution modes
- Production — real executions triggered by live events
- Test — runs you launched manually from the editor
- Manual — manually triggered executions
Export and import workflows
Move workflows between organizations or keep your own backups with JSON export and import.
- Export — open a workflow's row menu and choose Export JSON. The file contains steps, connections, and execution settings. Organization-specific and sensitive material is stripped: record IDs referenced by steps (labels, team members, AI personas, WhatsApp channels and templates, lifecycle stages), webhook secrets, error-workflow references, Simple API Request headers, and captured sample responses.
- Import — click Import at the top of the Workflows page and pick a
.workflow.jsonfile. The workflow arrives as a draft.
Review before publishing
Steps that pointed at organization-specific records — labels, team members, AI personas, channels, templates, lifecycle stages — arrive unconfigured and need to be re-pointed at your own. Simple API Request steps need their headers re-entered, since credentials are never exported. The editor highlights unconfigured steps so they're easy to spot.
URLs and request bodies are exported as written
A Simple API Request step's URL and body travel in the export exactly as you authored them. Keep secrets in headers (which are stripped) — or remove them from the file before sharing it.
Workflow examples
Here are a few common patterns to get you started.
Auto-assign by channel
Route WhatsApp conversations to a specialist:
Trigger: New Conversation
→ Decision: Channel is WhatsApp?
  → True: Assign to User (WhatsApp team lead)
  → False: Assign to AI (General support persona)
Delayed follow-up
Send a follow-up if a conversation stays open:
Trigger: New Conversation
→ Send Message ("Thanks for reaching out! We'll be with you shortly.")
→ Delay: 1 hour
→ Decision: Conversation still open?
  → True: Send Message ("Just checking in — is there anything else we can help with?")
Smart labeling and escalation
Detect urgent messages and route them appropriately:
Trigger: New Conversation
→ Decision: Message contains "urgent"?
  → True: Add Label (Urgent) → Assign to User (Senior agent)
  → False: AI Extraction → Assign to AI
Notify an external system
Send conversation data to a webhook when resolved:
Trigger: Conversation Resolved
→ Fetch API: POST to your webhook URL with conversation details
Tips for reliable workflows
- Start simple — one trigger, one or two actions, then add complexity.
- Test before publishing — always run a test to confirm things work as expected.
- Use descriptive names — clear names make workflows easy to find later.
- Watch run history — check the Runs page regularly to catch failures early.
- Lean on labels — labels make great building blocks for decisions and organization.
Node reference
Every node type has its own reference page — what it does, its variables, and its settings:
Trigger nodes
Every event that can start a workflow, and the variables it provides
Action nodes
Everything a workflow can do, with parameters and outputs
Logic & flow nodes
Decisions, delays, endings, and API requests
Use cases by industry
Two ready-to-build recipes for each industry
Related topics
- AI Agent — configure the AI personas your workflows can assign to
- Labels — create labels to use in conditions and actions
- Skill Sets — build custom skills for your workflows
- Contacts & Segments — the contacts your workflows interact with